Saturday, October 8, 2011

Pumpkin Burgers

One of my favorite parts of Halloween is a family tradition of my family since I was kid. Each year for Halloween we make pumpkin burgers. I have made these every year for as long as I can remember, and I can't imagine a Halloween without them. They are simple and fun, and you'll want to make them over and over again! And, not to worry no pumpkins are harmed in the making of these burgers!

These take a few simple ingredients:

-Biscuits (Make your own or go easy and use Pillsbury, whatever you have time for)
-Ground beef (or ground turkey)
-Onion
-BBQ sauce
-Shredded cheese


For this sample I did a couple pack of standrd size biscuits, 1 lb ground beef, and half an onion and it made 15 small burgers. One of the great things about these is you can easily make a few or a ton.

First, preheat oven to 350. Then, brown the ground beef with the onion.

Drain the beef and mix with BBQ sauce until its all coated. 
Take a biscuit and flatten it out.
Put flattened biscuit on cookie sheet and put a scoop of the ground beef on it. Be sure there is room around  all of the edges.
 Put a bit of cheese on top
 Flatten out another biscuit and cut a jack-o-lantern face in the biscuit, a butter knife is great for this. It is also a great job for kids (or husbands who are sometimes kids)
 Put your cut out face over the beef and cheese.

 Bake your nuggets of goodness for 8-10 minutes,or until golden brown. 
 Enjoy!!

Every year we say that we should eat these more often than just at Halloween, but for some reason it just never happens. So every year we get the start of October, and I start getting excited about eating these and eat them up like there is no tomorrow when I get them!

Linked up at:
BWS tips button
The Girl CreativeMaking Monday Marvelous Linky Party
It's a Blog Party
I'm topsy turvy tuesdays
rocaandcompanyTotally Tutorials Tuesday

Friday, October 7, 2011

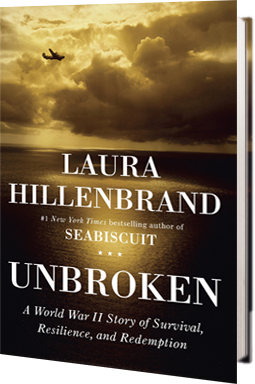
Unbroken

I just finished our next book club book and it was fantastic! 
Unbroken is the story of Louis Zamperini, an Olympic runner who enlisted in World War II. A plane he was on over the Pacific went down and him and the two other men who survived were lost at sea. They floated on the shark infested open ocean for a total of 47 days, and then captured by the Japanese Navy and taken as prisoners of war. The story goes through Louie's journey as a POW, and after the war. 

This isn't the happiest of stories, it is about the struggles of wartime and the men who are at the heart of the war, sometimes the worst parts of it. But, it is also the story of the triumph of the human spirit and how the will to overcome and live can get you through the toughest experiences.

It is very well written, and you get much more than just Louies story. You follow some others that he is close to, and get a good amount of history about the war. There are some great pictures to look at as you go along as well. I would highly recommend this book - a great read!

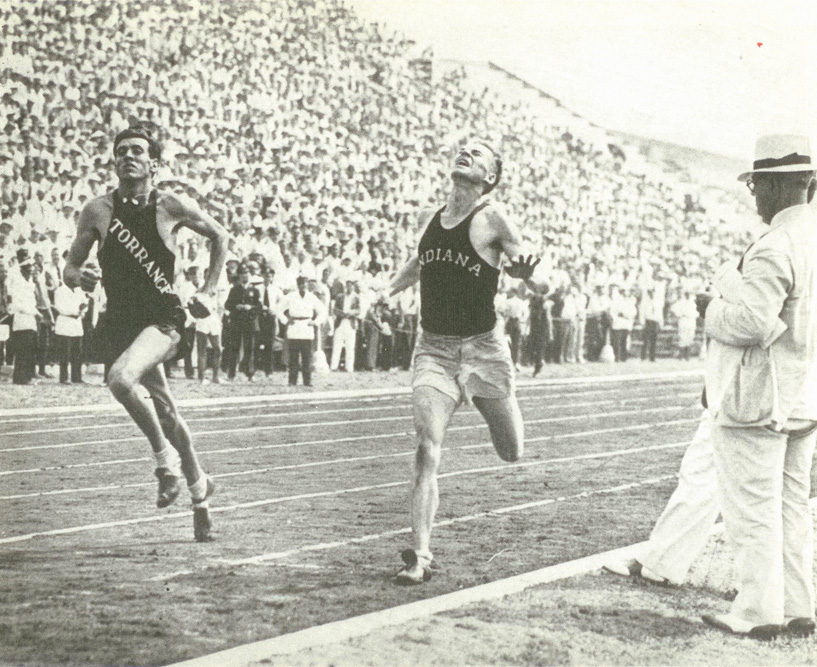
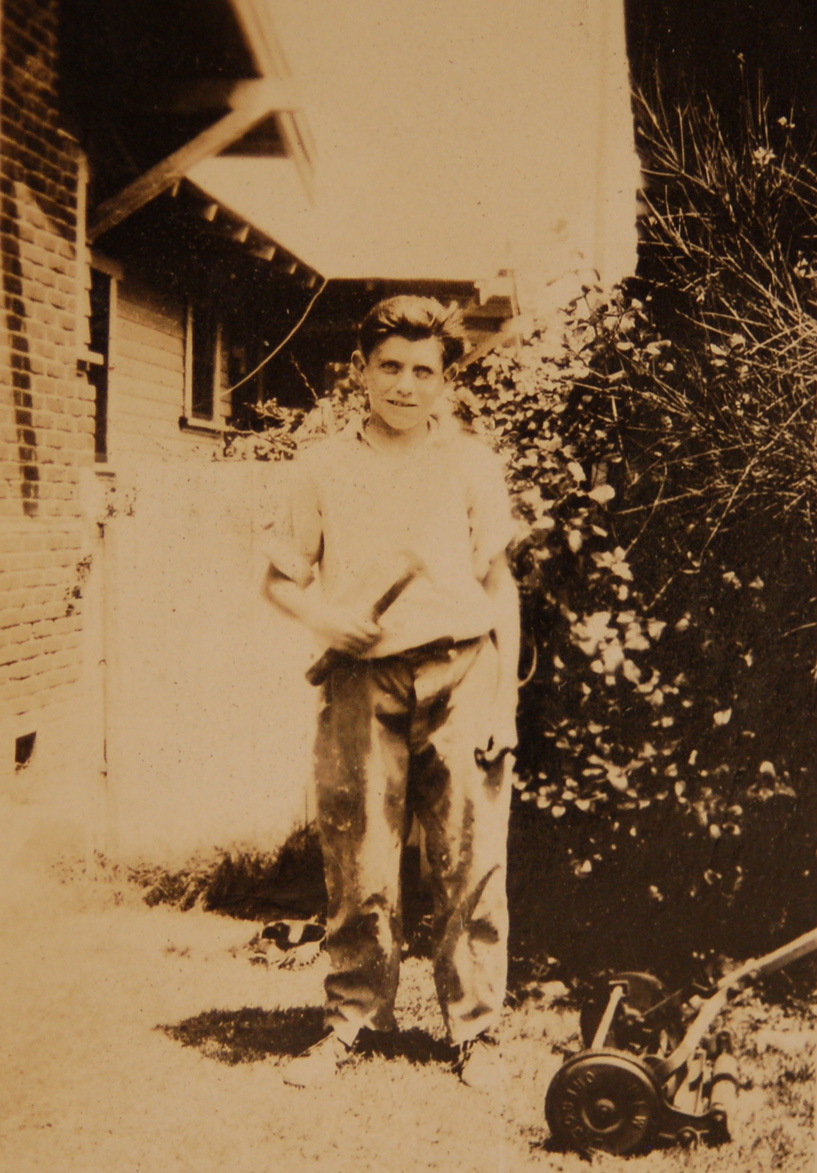
Here are some pictures from the Unbroken website:

A young Louie at his home in Torrence, Ca

Louie in the 1936 Olympic trials

Examining the plane after coming in from a fight

Louie skateboarding recently, a sport her took up in his 80s


Tuesday, September 27, 2011

Fall Fun

I'm still in the wedding explosion faze in my apartment, and I don't think I'll get to be able to do fall crafts. I'll be sure to fit in what baking I can (bring on the pumpkin), but it may be limited. And, I hear there may be a pumpkin shortage this year in the northeast. Another good reason to live in So Cal! If I had all of the time and space in the world, here are some fall things that I'd love to do. Thank you Pinterest for so many of these ideas.

Baked Pumpkin Donut Holes from The Craving Chronicles

Pumpkin cupcakes from Duncan Hines


One thing that we will be doing is pumpkin carving. The hubs carved his first pumpkin  EVER with me a couple years ago. Somehow he went 26 without ever carving his own pumpkin, so now it is a must do for us each year. I'm excited to do something a little fun a different this year.
Fanged Pumpkins from Martha Stewart


Shish-ka-boo Jack o lantern from Disney Family Fun

I have lots of burlap from the wedding, and was looking for some good things to do with it, and I think a burlap wreath, or two, may be the winner. 

Burlap Wreath from Etsy

Crochet Beret with Bow from Creative Yarn

Trick or Treat boxes from Brown Paper Packages via eighteen25

BOO! jars from Uncommon


Monday, September 26, 2011

Baked Devils Food Cake with Angel Frosting


Another hit from the guys at Baked! These great Devil's Food Cake with Angel Frosting are from Baked Explorations, which I have sadly had to recently return to the library. I opted to make these nuggets of goodness in a cupcake form, because that is just cuter. :)

This cake is moist, chocolaty, and just a little dense. The frosting is amazing - it is marshmallow cream. I've made marshmallows plenty of times before (I'll do a post on that in the next week or so), and always wondered how they make the marshmallow cream in the jars. Now I know!

This recipe made 20 or so cupcakes, or the recipe can make a double layer 8 inch cake. The frosting recipe could easily be taken down, I had a bunch of extra frosting, which isn't all that bad since you can eat by the spoonful if needed. :)
Ingredients
For the Devil's Food Cake
1 ounce good quality dark chocolate (60-72%) broken into a few pieces
1/2 cup dark unsweetened cocoa powder (like Valhrona)
2/3 cup hot coffee
1/3 cup whole milk
1 1/2 cups all purpose flour
1 teaspoon baking soda
1/2 teaspoon salt
10 tablespoons (1 1/14 sticks) unsalted butter, cut into 1/2 inch cubes, softened
1 cup firmly packed dark brown sugar
1/2 cup granulated sugar
3 large eggs
1 teaspoon pure vanilla extract

For the Angel Frosting
5 large egg whites, at room temperature
1 1/2 cups granulated sugar
1 tablespoon light corn syrup
1 teaspoon vanilla paste (or 1 1/2 teaspoons pure vanilla extract)

Make the Devil's Food Cake
Preheat the oven to 325 F. Line the cupcake pan with liners. If you are making a cake, butter two 8 inch round cake pans, line the bottoms with parchment paper, and butter the parchment. Dust the parchment with flour and knock out the excess flour.

Place the chocolate and cocoa powder in a medium heatproof bowl. Pour the hot coffee directly over them and whisk until combined.

In another bowl, sift together the flour, baking soda, and salt. Set aside.

In the bowl of a standing mixer fitted with the paddle attachment, beat the butter and sugars on medium speed until fluffy, about 3 minutes. Add the eggs, one at a time, beating well after each addition, then add the vanilla and beat until incorporated. Scrape down the bowl and mix again for 30 seconds.

Add the flour mixture in three parts, alternating with chocolate mixture, beginning and ending with the flour mixture.

Fill cupcake liners 2/3 full. Bake for 15-20 minutes (35-40 for cake) or until a toothpick inserted in the center of the cake comes out clean.

Make the Angel Frosting
Place the egg whites in the bowl of a standing mixer fitted with the whisk attachment. Set aside.

In a medium saucepan over low heat, stir together 1 1/4 cups of the sugar, the corn syrup, and 1/4 cup water. Once the sugar is dissolved, increase the heat to medium high, and clip a candy thermometer onto the side of the pot. Heat the mixture, without stirring, to almost soft ball stage ( about 235 degrees F) do not let it go above 235 degrees F.

While you wait for the syrup to reach soft ball stage, whip the egg whites on medium speed until soft peaks form-do not beat beyond this.

As soon as the sugar mixture reaches the soft-ball stage, remove the pan from the heat.

Sprinkle the remaining 1/4 cup sugar over the soft peaks of the egg whites and turn the mixer to low. Slowly stream in the hot sugar syrup. Once all the syrup has been added, increase the speed to medium high and beat the icing for about 7 minutes until it is thick and shiny. Add the vanilla and beat again for 10 seconds.

I think that this frosting would pipe very well, but it came out very well just swirling it with a knife. It is super shiny. They recommend serving in within 4 hours of making the frosting, but we actually didn't eat ours for a day and half, and the frosting was still yummy, delicious, and still had it's fluff to it.

Saturday, September 24, 2011

Cupcake Crafts

Each year the Girl Scout council I work for hosts an large fundraiser, called Urban Campout. One part of the event is a silent auction that is held, and the team I work on donates a basket to the silent auction. Last year we did a cupcake theme for the basket, and it was a blast to put together. This year, since I was getting married the next day, I opted out of coordinating the basket for our team. :) Here is the cupcake creation we made last year, and a bit about the crafts that I put together for it.

The first thing I put together were these cupcake stands. I'm a believer in presentation of food. When you get that first impression that is looks great, you do into it expecting the best. I am a fan of cake stands (and just got this one that I love, but haven't been able to get it since I still have wedding explosion all over our 400 sq feet of apartment.) When I saw these adorable DIY cupcake stands in Crafts & Things magazine, I knew I had to make them. They are fairly simple and can be decorated up more or coordinated to match a party theme. 


You need:
2 inch pots
3 inch saucers
acrylic paint
one button for each holder
string
super glue

Start by painting the pots and saucers. Do a double coat to be sure to get it all covered and looking nice.
You are then going to cut a piece of string long enough to attach the button around the pot. I also put a dab of glue behind the button so it was sure to stay in place.
Then glue the saucer to the pot
and you are done! Just place a cupcake in the top for ultra cute presentation!  Be creative with the color combos and buttons. You could also add some rick or ribbon around the saucer.

We were also including sprinkles and cake mixes in the basket, and I wanted to display them in something other than the box or container they cam in, so I did some decorating of jars for them. 
I drew some basic cupcake shapes on white paper for a pattern, and then cut them out of some cute dotted paper.
I then just took some glue and put them on the jars and they were good to go! (and even cuter once they were all full.
And here is our finished product with all kinds of cupcake fun!

Linked up at:


Thursday, September 22, 2011

Banana Coconut Muffins

In the midst of the wedding mayhem, our bunch of bananas sat on the counter for a week and did not get eaten. So, I decided since there were several of them that I'd make a batch of banana muffins. Ordinarily I'd put chocolate chips in them, but I was fresh out of those.

So, I decided to just go ahead and make plain banana muffins. Then, as I was looking in the cupboard I saw a bag of coconut. I mentioned to the hubs that I wanted to make some banana coconut muffins. I expected him to do the usual, 'eh whatever you want babe.' Instead I got 'wow that sounds really good!' This is a very unusual thing to hear from him, so I jumped on it and started!

I used this recipe from All Recipes for banana muffins, and added in a cup and a half of coconut to it. When these came out, hubs couldn't wait to dig in because they were the perfectly browned and looked great. They tasted as great as they looked. The picture isn't doing it justice, my camera is dead and charging so I used the webcam on the computer to take these pics of these nuggets of yumminess.
Here is the recipe. It's simple and easy, and great. This is for 12 muffins, one of my favorite features in All Recipes is that you can change the servings and it will recalculate the ingredients for you. I went ahead and recalculated to 18 muffins, and it actually made 20.

Banana Coconut Muffins
Makes: 12 muffins


Ingredients

  • 1 1/2 cups all-purpose flour
  • 1 teaspoon baking powder
  • 1 teaspoon baking soda
  • 1/2 teaspoon salt
  • 3 large bananas, mashed
  • 3/4 cup white sugar
  • 1 egg
  • 1/3 cup butter, melted
  • 1 1/2 cups shredded coconut

Directions

  1. Preheat oven to 350 degrees F (175 degrees C). Coat muffin pans with non-stick spray, or use paper liners. Sift together the flour, baking powder, baking soda, and salt; set aside.
  2. Combine bananas, sugar, egg, and melted butter in a large bowl. Fold in flour mixture, and mix until smooth. Stir in coconut. Scoop into muffin pans.
  3. Bake in preheated oven. Bake muffins for 15-20 minutes. Muffins will spring back when lightly tapped.